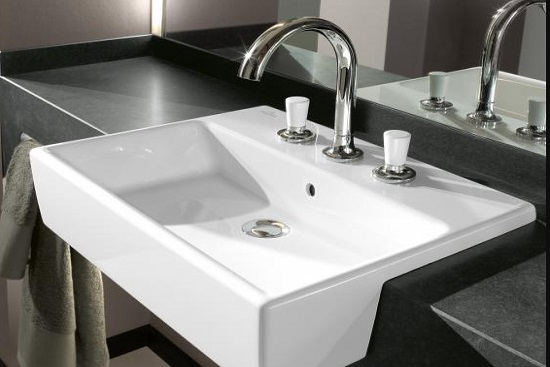
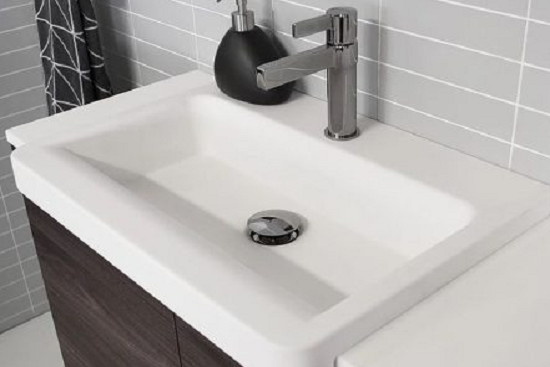
If you want to know how to install semi recessed basin in your bathroom, then the article I have prepared for today is specially written to cater to your concerns. The content of this article comprises the mounting process of semi recessed basin and how to secure basin to vanity unit if you are indeed using one.

Tools and Materials Needed
Before we continue on the steps of how to semi recessed basin, it’s imperative to discuss firstly the tools and materials you will need for the procedure. The following is the list of necessities you have to take note of—
- Eye protection such as goggles
- Four plastic cups and rubber washers
- Four pieces of tapping screws (it is highly suggested to use brass since it is extremely water-resistant and tolerable against rusting and weathering
- Basin wrench and pipe wrench
- Screwdrivers
- Carpenters level
- Tape measure
- A set of standard woodworking tools
- Slip joint pliers
- Nails
- Caulking gun
- You can use either silicone or plumbers’ putty as long as they’re waterproof
- Self-tapping screws
- Drop cloth
- Hacksaw
- Cement, tubing cutter, grout, and plaster
- 2×2 or 1×3 stringers
The number of tools and materials you will need for the inset basin is quite a mouthful, but you have to gather all of them and complete the necessities in order to for you successfully lay out the procedure of how to install a semi recessed bathroom sink.
Steps of Installing Semi Recessed Basin
A semi recessed basin provides a certain aesthetics that is pleasing when it comes to geometric satisfaction if you will. However, the process of mounting the new semi recessed basin involves cutting a certain part of the fixture if it is needed.
So, how to cut countertop for bathroom sink? Now, we move on to the installation and framing process and see how you can achieve a stylish bathroom sink—
First Step: Cut a Hole onto the Vanity Cabinet, if Necessary
First and foremost, you need to get the dimensions of the hole you are going to install in your semi recessed basin, as I have mentioned.
There are vanity cabinet countertops that have a premade hole specially made for semi recessed sinks. And if this is the type of countertop you have in your bathroom, then you need to gather measurements of the hole in order to get the right basin for the furniture.
If the vanity has no hole, then you have to draw them yourself using a hacksaw. For this part, you will need to gather the measurement of the bottom part of the sink and translate that to the surface of the vanity by using a circular ruler and pencil.
However, it is highly recommended that you ask for assistance from your local carpenter if you are not sure how to do this process.
Second Step: Choose Your Perfect Bathroom Basin
First and foremost, you have to shop for the perfect bathroom basin that fits your special preferences and needs. If you are undecided on what bathroom sinks to buy, then you can check out this reference for a catalog of some designs you can opt for.
Third Step: Prepare the Basin
Position the basin on top of the countertop and flip it over carefully. You have to be self-conscious as you turn it over to prevent any accidental scratches or breakage from occurring.
After doing so, you need to apply silicone coating on the outer edges of the recessed part of the basin, where it will make contact with the ends of the vanity cabinet.
Fourth Step: The Installation Process
Turn the sink over and embed them to the cutout on your cabinet. You have to tweak them until they are perfectly aligned and not wobbling. To secure the basin from moving around, use two pieces of self-tapping screws and put them in accordance with the two holes you’ll find underneath the basin.
If the vanity cabinet has no holes, you will need to drill them yourself. Position the sink and mark where the holes and screws would intersect.
Remove the sink and put them aside for a moment as you drill the two holes needed to secure the basin. After doing so, place the basin back and screw them in place using the brass screws and cup washers accordingly.
Again, apply a generous amount of silicone solution onto the edges of the sink, and then remove any excess sealant immediately before it dries out. Lastly, press the sink down lightly until the sealant has completely cured.
Semi Recessed Basin Recommendation
The following are extra tips to ensure the success of the procedure on how to install semi recessed basin—
- Always wear safety gear to prevent accidents from happening
- Unplug electronic equipment after you have used them
- Some bathroom sinks are fragile, which will require you to handle them with extra care
- Do not over-tighten the brass screws because the pressure might cause breakage if you do so
- Clean the excess silicone immediately after you have applied them before it completely cures so it would prevent them from drying them

Takeaway
Although it’s a bit expensive, the semi recessed basin is a good investment in giving your bathroom that sense of style you crave plus high functionality. This may be the case—you have to be extra careful to avoid the ceramic sick from scratching or cracking as you proceed with how to install semi recessed basin.
Frequently Asked Questions about How to Install Semi Recessed Basin
The following additional pointers below are some of the notes you have to consider on how to install semi recessed basin—
As the name suggests, a semi inset basin is basically vanity sinks like an undermount and vessel sinks that are balanced and appear to be cut. This type of style emits a geometric pattern that is satisfying and uniquely aesthetically pleasing.
The dimensions of the hole of the vanity must rely on the measurements of the semi recessed basin you have availed. On the other hand, there are vanity cabinets with a premade hole that you have to take note of. If this is the case—you have to take into consideration the dimensions of the cabinets’ already-made depression.
0 Comments for “Basic Guide on How to Install Semi Recessed Basin”