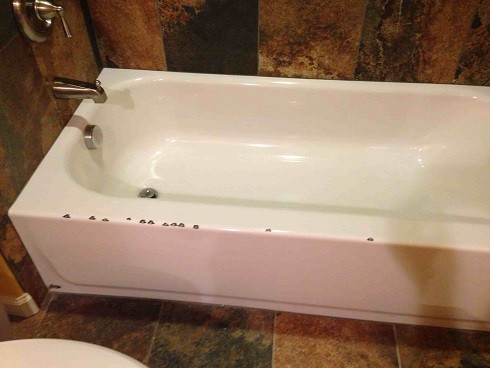
How to fix a chipped bathtub? This is a question that most bathtub owners come across when they see damage on the surface of their tubs. For minor chips on the surface of the bathtub, instead of spending on the tub replacement, you can treat this as a do-it-yourself project.
- Why Do You Need to Fix the Bathtub?
- Tools and Materials for Fixing the Bathtub
- Step by Step Guide on How to Fix the Bathtub
Why Do You Need to Fix the Bathtub?

Buying a new bathtub is not always the solution. Sometimes, all you need is a bathtub repair kit to fix the problem. Your bathtub will regain its pristine condition without spending hundreds or even thousands of dollars.
Here are the reasons why you need to fix your bathtub?
It is way cheaper.
The cost of the kit sealers is just $20. Acrylic, enamel, porcelain or fiberglass repair kits range from $20 to $50. The price of a new bathtub is, at the very least, $400. This does not include the expenses for labor and plumbing.
It is a DIY job.
You do not necessarily need to hire an expert to fix your bathtub. You have a lot of available kits available online or in hardware stores.
Minor repairs restore the bathtub.
Minor bathtub repairs for scratches, dents, patches, and holes can easily be done through kits. Instead of waiting for a professional to do some refinishing work, you can repair it yourself and restore your bathtub in a matter of minutes.
Tools and Materials for Fixing the Bathtub
How to fix chips in bathtub? You need to prepare the following tools and materials:
Tools:
Screwdriver
This is used to remove fittings that will be repaired. A handy screwdriver should be prepared beforehand
Wrench
A wrench is used to tighten or loosen bolts and pipes.
Gloves
Gloves are utilized to protect the hands from injuries and accidents.
Putty knife or spatula
If you know how to fix chips in bathtub or how to fix bathtub crack, then you understand the importance of a putty knife or spatula. It is used to apply putty on the bathtub surface.
Materials:
Repair Kits
Repair kits are simply epoxy chemicals that are made especially for bathtubs. But you have to understand that not all repair kits are the same. Some kits are for fiberglass, some for acrylic, some for porcelain, and others for ceramic or enamel. For bathtubs, the most common color is white or cream.
Bathtub cleaner
Surface preparation is important when repairing bathtubs. You will need a bathtub cleaner to completely rid the surface of residue and dirt.
Sandpaper
Another key material that you should bring is sandpaper. This is used when patching or refinishing the surface of the bathtub.
Step by Step Guide on How to Fix the Bathtub

1. Prepare all the materials and tools that will be utilized to fix the bathtub. Ensure that all of the items are nearby so that you can easily reach for them during the whole process.
2. Prepare the surface to be repaired. You can use a bathtub cleaner along with a sponge to clean the damaged part. You can also pour warm water on it to remove any residual material. Dry the surface with a clean rag.
3. Get the repair kit. Look at the directions stated on the label. Utilize the stirring sticks and mixing trays that are packed in the kit.
4. Use a spatula or putty knife to apply the epoxy to the damaged area. You can also use a paintbrush or a stick for holes and hairline scratches. Do not use too much epoxy on an area. It is better to slowly add more epoxy than to remove it from the tub.
5. Let the epoxy dry. Get the sandpaper with a 500 to 600 grit and carefully sand the surface until it becomes smooth.
Tips and Warnings
Not all cracks can be repaired. If the crack is too deep and runs along a large surface area, it is better to replace the tub rather than fix it.
Bathtubs with faded colors need to be replaced. It is already worn out and needs to be replaced.
Always weigh your options. Make the right decision on the option that will give you savings in the long run.
Conclusion
How to fix a chipped bathtub? The answer is simple. A repair kit will help you smoothen the surface and fix it in no time. But you should take enough time to prepare the surface beforehand. Make sure that you cleaned the surface thoroughly so that it will be easier for you to repair the chipped tub and sand the area.
Frequently Asked Questions
Plastic bathtub refinishing is the same as doing it on a porcelain or fiberglass repair. The surface is cleaned and prepared. It is then filled and sanded to be smooth.
The easiest way to do this is to remove the paint chips with a small brush or a spatula. Clean the surface and then put a layer of epoxy on the cracks and chips. Make sure that the epoxy has the same color as the tub.
Yes, a chipped bathtub is dangerous. A bathtub with chips and cracks can cause serious wounds or injury to the skin. Make sure to repair it as soon as you can. How to fix a chipped bathtub should be your first question in mind.
0 Comments for “How to Fix a Chipped Bathtub | A Guide to DIY Repair”