Bathroom sinks are an important part of any bathroom. Not only are they functional, but they can also be a focal point in the room. And while sinks are crafted in a variety of designs and materials, they all need to be properly installed in order to function correctly. However, installing a bathroom sink can be a tricky proposition.
Fortunately, there are some simple steps you can follow to make the process go smoothly. With the right tools and a little bit of patience, you can have a new bathroom sink installed and running in no time.

Tools and Materials Needed in Installing a Bathroom Sink
-Bathroom sink
-Pipe wrench
-Plumbers putty
-Teflon tape
-Pipe dope
-Power Drill/ drill bits
-Hacksaw
-Jigsaw/ circular saw
-Adjustable wrench
-Channel-type pliers
-Putty knife
-Caulking gun
-Caulk
-Silicone sealant
-Bucket
-Rags
How to Install a Bathroom Sink in 7 Steps
Installing a bathroom sink may seem like a daunting task, but it really is a fairly easy task that most people can do without too much trouble. Follow these seven easy steps and you’ll have your new sink installed in no time.
1. Remove the old sink
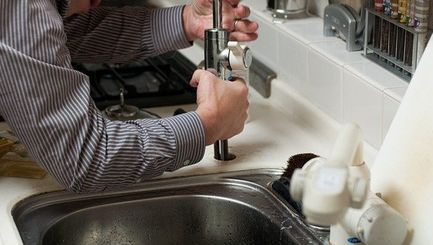
If you’re planning on installing a new bathroom sink, the first step is to remove the old one. This can be a tricky process, so it’s important to follow the directions carefully. Here is how to replace a bathroom sink by first removing the old one:
First, switch off the sink’s water supply line. This is typically done by shutting off the valves under the sink. Once the water is turned off, open the faucets to release any remaining water in the lines.
Next, disconnect the drain lines from the sink. There are usually two lines, one for the hot water and one for the cold. A wrench can be used to loosen the nuts holding the lines in place.
Once the drain lines are disconnected, you can begin to remove the sink. There are usually two ways to do this. The first is to remove the entire sink top, which is held in place with screws. The second is to remove the sink from the countertop.
With the old sink removed, you’re now ready to install the new sink.
2. Clean up the countertop
Assuming you have already switched off the water connected to the bathroom sink, the next step is to clean the countertop where your new bathroom sink will be installed. This is an important step because you need to make sure that the area is clean and free of any debris before you begin the installation process.
You can use a mild soap and water solution to clean the countertop, or you can use a commercial cleaning product designed for bathroom surfaces. Be sure to rinse the area well and allow it to dry completely before proceeding.
3. Measure the new sink
When you are ready to install your new bathroom sink, the first thing you’ll need to do is measure the sink and its dimensions. This is important so that you know how much space you have to work with and what sink size you need to purchase. There are a few things you need to take into consideration when measuring the sink.
First, you need to measure the width of the sink. This is important so that you know how much space you have to work with when installing the sink.
Second, you need to measure the depth of the sink. This is important so that you know how deep the sink needs to be in order to fit in your bathroom.
Finally, you need to measure the height between the sink and tap. This is important so that you know how high the sink needs to be in order to be comfortable for you to use.
Once you have all of these measurements, you can proceed to install the sink.
4. Mark the countertop for a new hole
After obtaining the sink measurements, it is time to mark the countertop for the correct dimensions of the sink. This is a vital step because you want to make sure the sink fits perfectly in the space you have available.
There are a few different ways you can go about marking the countertop for the sink.
The first is to use a tape measure and measure the space you have available. Once you have those measurements, you can mark the countertop with a pencil or marker.
Another way to mark the countertop is to use the template that comes with the sink. If the sink does not come with a template, you can make one yourself or purchase it from a home improvement store.
This is the easiest way to make sure the sink will fit perfectly in the space because you can simply trace the template onto the countertop. Once you have the sink template in place, you can use a pencil or marker to trace around the outside edge. Then, use a straight edge to connect the dots and create a cut line.
Once you have the countertop marked, you’re ready to move on to the next step in installing a bathroom sink: cutting the hole for the sink.
5. Cut out the outline on the countertop
Once you’ve marked the area, you’ll need to use a drill to create pilot holes. These pilot holes will help to make sure that your cut is straight.
After you’ve created the pilot holes, you’ll need to use a jigsaw or circular saw to cut out the hole.
Before cutting, make sure the tools you’ll be using are properly sharpened and clean. You don’t want to damage the countertop or the sink, so a clean cut is essential. Be sure to follow the lines that you’ve marked.
Once you’ve cut out the hole, you’ll need to sand the edges to make sure they’re smooth. Use a router or a sander to remove any burrs or roughness from the hole. Be sure to go slowly and evenly so you don’t damage the surrounding countertop.
Before proceeding with installing the sink into the hole, be sure to apply a bead of silicone caulk around the top edge of the sink. This will serve as a watertight seal between the sink and the countertop.
6. Install the new sink
First, make sure the sink is properly aligned and leveled with the hole. There should be enough space around the sink so that you can easily access the plumbing beneath it. If the sink is not properly aligned, it could cause problems with the plumbing or the sink itself could crack.
Once the sink is properly aligned and level, begin to lower it into the hole. Be careful not to damage the sink or the countertop as you do this. If you’re working with a pedestal sink, make sure the base is properly positioned before you lower the sink onto it.
Consider applying silicone caulk around the edges and connecting areas to adhere the sink to the countertop, if necessary.
7. Connect the plumbing
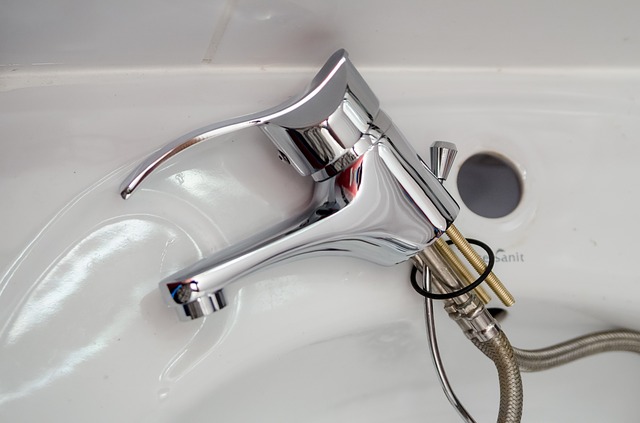
Once the sink is in place, you can start connecting the bathroom sink plumbing. If you’re working with a pedestal sink, you may need to install the P-trap before connecting the water lines.
Connect the P-trap to the drainpipe. Use Teflon tape or plumber’s putty to create a seal. Once the P-trap is in place, connect the water lines to the supply valves beneath the sink.
Tighten all the bathroom sink plumbing and connections with a wrench, being careful not to over-tighten and damage the valves or the sink. Turn on the water supply and check for leaks. If there are any leaks, tighten the slip nuts until the leaks stop. If there are no leaks, you’re finished.

Conclusion
In conclusion, installing a bathroom sink is a relatively easy process that can be completed in seven easy steps. After reading this article, you should now know how to replace a bathroom sink or install a new one step-by-step. This process is not as difficult as it may seem and can be completed in a few hours. Just be sure to have all the necessary tools and materials before starting.
Frequently Asked Questions (FAQs)
Yes, you can install a new sink yourself. With the right tools, and a proper set of instructions which you can refer to the above content, installing a sink can be surprisingly easy.
Yes, you can change the sink without changing the countertop. In fact, it’s a lot easier to change the sink than the countertop. The only thing you have to do is remove the old sink and then install the new one in its place. You don’t even have to remove your countertop.
Yes, sealants and adhesives have a few varying qualities suited for different uses.
Silicone sealant is typically used for sealing small holes and cracks, like around windows or doors. It dries clear and flexible, so it won’t crack or yellow over time. It’s also easy to remove—you can just peel it right off.
Silicone adhesive is better suited for larger jobs, like wet rooms or bathtubs. It’s thicker than silicone sealant, which makes it great for filling gaps that need extra reinforcement. The adhesive also sets up quickly, which is great if you’re in a hurry.
0 Comments for “7 Simple Steps On How To Install a Bathroom Sink”