People say that a bathroom is a reflection of a person’s personality. So, improving them through renovations or other additions should be at the top of the list for any homeowner; after all, no one wants to be “judged.” Given this, many are constantly looking for a new bathroom product. One of the best options is a unique and alluring bathroom sink like a wall hung basin.
Installing a wall hung basin in your bathroom will surely increase the “feel” of it. But how are you going to install it? It might have been some time since your last DIY, or perhaps you’ve never done this kind of DIY bathroom renovation before. Whichever the case, if you are one of the clueless people asking how to install it or how to install a vintage wall mount sink in place of what they currently have, this article is definitely for you. But before you go to that part, you should first know what you are trying to put in your restroom. And if you do not have a complete idea of it, you had better read and finish this until the end. So, without further ado, let’s begin.

What is a Wall Hung Basin?
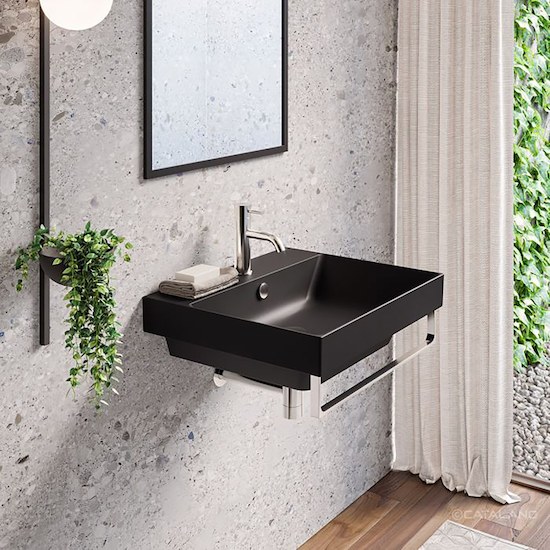
Wall hung basins, also known as bathroom sinks, are essential in any restroom. Wall hung basins are not your typical bathroom sink. Unlike the common ones you find in restrooms, these restroom sinks are mounted directly on the wall using wall-fixing bolts and brackets. Regardless of the size, be it a large or a small wall hung basin, they are fixed on the wall independently from any support or pedestal. Given this, they are sometimes called “wall hung sinks” or “wall mounted basins.”
How to Install a Wall Hung Basin?
If you are thinking of replacing your bathroom sink with a wall hung basin, you probably searched the internet for “how to install wall hung basin,” or simply “install wall hung basin,” and such. And perhaps you came across some valid pages. Still, you should know that some of them are incomplete or use too complex explanations. But we will make it easier and more understandable for you. However, remember that wall hung basins come with taps, so you will definitely need a plumber unless you are an experienced DIY person. If you are not, do not risk it and incur added costs afterward. But, mounting the basin should be doable. So, if you are confident, here are the 7 Easy Steps to answer your question about “how to install a wall hung basin.”
1. Prepare the tools

Like any task, the first step in wall hung basin installation is to prepare the necessary tools. Making sure you have them will make the job easier and less time-consuming. So here are the tools you need to have:
- Adjustable Spanner
- Pliers
- Pencil
- Screwdrivers
- Drill
- Silicone
- Wall plugs
- Tape measure
- Dust sheets
- Spirit level
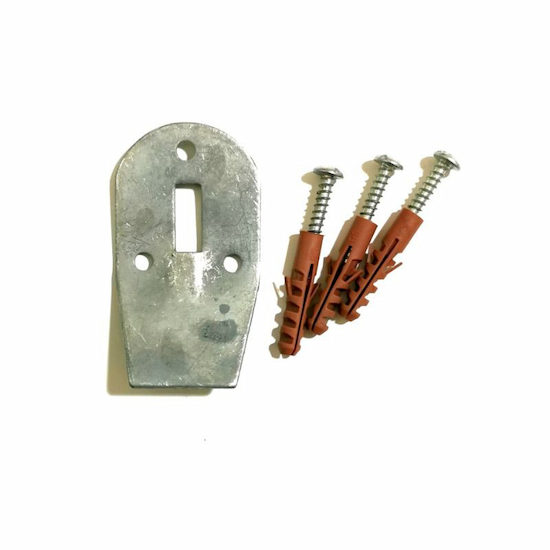
- Wall hung wash basin brackets
Aside from being essential in the installation, these tools are also needed in hiding the pipes of a wall hung basin.
2. Remove the old bathroom sink
If you want a new sink, you must remove the old one, which is the second step. Be mindful. When removing your old sink, turn off the water supply using a spanner or a plier. Afterward, disconnect the taps. You can achieve this by tightening the nuts on the supply lines. When you are done with this, you can then move to sever the nut that connects the drain to the sink by unscrewing it with your hands. Next, remove the silicone. Once the silicone is removed, carefully lift the old sink off its bracket, and you are done with step two.
Note: If you plan to use new wall hung wash basin brackets, you could remove the old ones; otherwise, you can leave them for later use.
3. Take care of the water in the supply valves.
Look for the hot and cold valves in the location where you removed your old bathroom sink. Dealing with these flexible pipes with a compression fitting and screw is very important. Hence, turn the screw a quarter away. After this, you should notice that the water flow stops. However, suppose you cannot locate the compression fitting. In that case, you can directly switch off the water at the mains.
4. Size the position where you want to mount the wall hung basin.

Once you have dealt with the water supply, move on to sizing your new bathroom sink. You can do this task alone or ask a friend to help. With the aid of a friend, the chances of having accidents will be lower. Hold and carefully lift the wash basin with your friend to your preferred level. Mark the wall area where the top of the basin will go (the standard measurement is 80-90 cm from the floor to the top), then extend it to your spirit level. Afterward, mark the center point using the water supply pipe as the reference. Once again, using the spirit level, draw and extend the line upwards.
Make sure that your measurements are correct to avoid issues later on. Measure the distance between the anchor holes on the wall hung basin. Using the center line you drew earlier, mark the space between them. Use a spirit level to mark the lines and measure how far they are below the basin’s top. This measurement shall give you the position where you should place the wall hung wash basin brackets.
5. Fit the waste and trap pipes
Now that you know where you want to put your wall hung basin, you can do the next step: install the waste and trap pipes. Insert the waste pipe into the plughole, line it up with the sink’s plughole, thread them, and seal with silicone. To ensure a snug fit, make sure the washer is applied.
When installing the replacement nut, ensure that any overflow holes—uncommon in modern wall-mounted washbasins—are aligned and secure them in place by inserting a screwdriver into the plughole. After doing this, your wall hang basin is now ready to install.
6. Hang your new basin
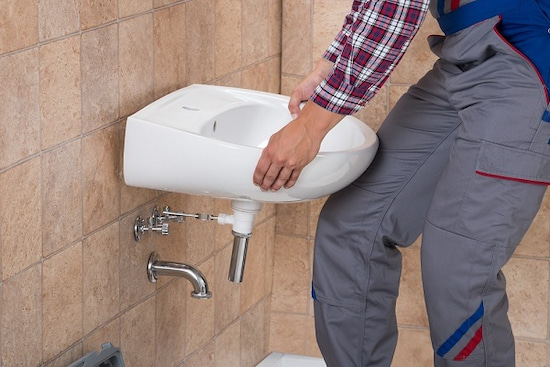
Follow the measurements you took earlier to hang your new wall hung basin. Drill the hole, place the left bracket on the wall, insert the wall plugs, and secure the bracket with screws. Holding the second (right) bracket, put it on the other side and use your spirit level to check that they are correctly aligned, then mark the locations of the second bracket’s drill holes. Place the bracket on the wall, drill the holes, install the wall plugs, and attach the second bracket with screws. The sink may now be attached, and presto—a washbasin that hangs on the wall!
7. Connect the waste pipes and seal the job
Using the nut on the waste pipe, attach it and the trap to the household foul water drain. Now, apply a line of silicone sealant along the joint between the basin and wall, smooth it with a damp finger, and wipe the back of your wall-hung basin to remove any debris or dust. Give it a day to dry, and it’s good to go.
Frequently Asked Questions about Wall Hung Basins
Installing a new wall-mounted sink can be confusing, so here are some of the frequently asked questions about Wall Hung Basins:
The consensus among experts regarding the basin height is between 80 – 90 cm regardless of whether it is a large, medium, or small wall hung basin. However, you may change this if you are particularly tall to take some pressure off your back when bending over the sink.
You can buy these wall-mounted basins in most home improvement stores. Wall hung basins are available in Australia, Europe, America, Asia, and Africa. You can also buy them online.
An essential part of the answer to the question of how to install a wall hung basin is the thing that makes it possible. So, to support a wall-mounted sink, you should use wall hung wash basin brackets and anchor bolts. These two make it possible for a basin to be installed in a wall without a pedestal.
0 Comments for “A Step-By-Step Guide on How to Install a Wall Hung Basin”