You will need a shower arm mount, plumbing tape, and some elbow grease to get the job done. Knowing how to install a wall-mounted shower arm is easier said than done though. But with the right tools and the correct step-by-step procedure, you can perform your shower arm installation in a matter of minutes.

- Types of Shower Arms | Know the Right Shower Arm Mount to Use
- Installation Process | How to Install a Shower Head Extension Arm
- Warning
Types of Shower Arms | Know the Right Shower Arm Mount to Use
Choosing the right shower arm is often based on preference. But sometimes, the type of shower head extension arm to use can also be influenced by the amount of space of the bathroom, its theme and overall design, or the other fixtures used along with it. To help you decide on the shower arm mount to buy, here is a list of the types of shower arms available in the market today.
Standard Shower Arm

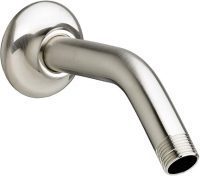
This is the most common shower arm that you can purchase. It is a basic design and can be made of brass, stainless steel, or chrome. The portion of the standard shower arm where the shower head is connected is made at an angle.
Straight Shower Arm

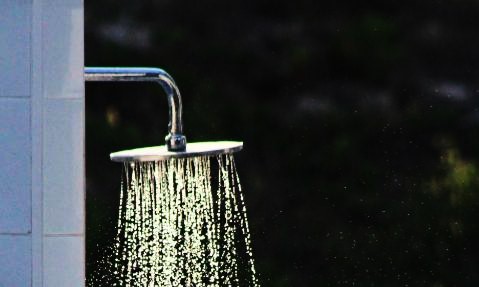
The shape of the straight shower arm is the simplest among the three because this type protrudes straight from the wall to the shower head. Keep in mind that, though you can use any shower head that you want, the straight shower arm is best used with rainfall shower heads.

S-Shaped or Gooseneck Shower Arm
If you want your shower head to be a little elevated, you may want to consider the S-shaped or gooseneck shower arm. Because of its shape, you can raise your shower head to the ideal height that you want. Modern bathrooms mostly use this type of shower arm mount.
Installation Process | How to Install a Shower Head Extension Arm
After picking the shower arm that you want, it is now time to start the shower arm installation.
1. Preparation before installation. Turn the water flow off.
The first step that you need to do is to stop the water flow in your bathroom. Not turning it off will cause the water to run through the pipes and out of the connection where you remove the existing shower head mount.
This can be done in two ways. You can either turn off the main valve that controls the water flow in the whole bathroom or locate the other valve in your bathroom that regulates the water going to the shower head.
2. Set up your work area.
Prepare the materials that you will use before you start working. This includes the shower head extension arm, step stool, plumbing tape, paper towels, and rubber gloves. Make sure that the step stool is secure and that you are comfortable throughout your work.
3. Look for the “Female” fitting.
In a plumbing system, there are “male” and “female” fittings. The male fittings are those which have threads on the outside. The female fittings are those which have threads inside the hole.
Look for the female fitting where you will connect the shower arm mount. If there is none, you have to cut through the drywall. Make sure to estimate the right amount of space to fit the shower extension arm.
Wipe off any excess tape or dust on the thread of the pipe.
4. Wrap the plumbing tape around the “male” fittings.
The plumbing tape secures the shower arm and prevents it from coming loose. Wrap the tape around the male fittings in a clockwise motion until all the threads are covered up. You will also do the same upon installation of the shower head.
5. Install the shower arm.
Insert the shower arm connector to the female fitting and tighten it using your hand. You may want to use a towel and wrap it around the attachment to protect the arm from getting damaged upon installation.
6. Install the shower head.
Mount the shower head on the newly installed shower arm. Find the fittings and move the shower head clockwise until it is secured. The job is complete.
If you are going to install shower head with hose, you will need an additional handheld shower head mount. Use a plumbing tape on the male fitting and attach it to the shower arm.
Warning
1. Make sure to open the valves that control water flow to the shower head.
Ensure that all the valves that you closed in preparation for the installation are now opened.
2. Check for leaks.
Before you keep your tools, you should first check for leaks. Inspect the fittings. Make sure that no leaks are found. You may use a wrench to tighten the connections if needed.
3. Clean the area.
After the installation, pack up all the materials and clean the work area for safety purposes.
Conclusion
Installing a wall mounted shower arm is not as difficult as it seems. You just need to prepare the materials, follow the steps, and clean up after the work. Make sure to select an appropriate shower arm along with the shower head that you prefer. Observe the connections to see if there are any noticeable leaks and do some tightening as needed.
FAQ about How to Install a Wall-mounted Shower Arm
A shower arm flange is a kind of shower accessory that helps to hide the hole on the wall. You just need to use pliers to remove the shower head, then remove the flange, use the pliers to flex the friction fit, then slide it back to on shower arms and attach it to the wall. If necessary, you can put some silicone seals on the flange and wall joints to better hold it in place.
shower arms always have threads on both ends. One end attaches to the fitting called a drop-ear elbow inside of your wall, while another connects with showerheads that turn onto their exposed joint near where you grip it for stability during use.
0 Comments for “Easy Steps on How to Install a Wall Mounted Shower Arm”