Knowing how to seal around sink (for your kitchen or bathroom) is an important and valuable skill. This is an easy DIY skill that you should learn in order to save money that hiring a professional would have cost you. Why pay for something that you can do perfectly? And in simple and fun steps? Our easy guide on how to seal around sink will give you all that you need in order to make your bathroom or kitchen sink superb. Read on to get these simple steps from professionals.
Why Seal Around Sink?
One of the most notable problems with both kitchen and bathroom sinks is the water that builds around them. This eventually leads to soap foam and mold on the rims of the sinks, both on top and on the bottom. Constant cleaning provides a solution. However, you have so many other places to clean and so many other things to do. Although there are relatively few sinks that come integrated or molded into one unit of both the sink and the countertop, most sinks in bathrooms and kitchens come as separate units from the countertop. This means that they must be installed.
During the installation process, kitchen and bathroom sinks are professionally sealed to the countertops. This makes the sinks stay in their place and makes the sink edges watertight. This prevents water from seeping beneath the sink edges which would hence lead to damage to the areas beneath the counter. Over time and as the caulk or sink sealant used to make the seal shrinks, dries out and cracks, the seal wears out and would therefore need a replacement.
Getting to know how to seal around sink to fit well with the countertop and using a high-quality kitchen sink sealant, or sealing your sink drain with silicone, will ensure that your sink remains in superb condition. This will also prevent future sink problems. In order to prevent water and other debris from seeping or entering through the gaps, you need to use high-quality and waterproof sink sealant to seal around sinks. Do you want to prevent water and mold damages in your bathroom or kitchen? Then you need to seal around your bathroom and kitchen sinks.
What Leads to Leaks?
Whether you contracted a professional to install your sink or you did it yourself, it is not uncommon for your sink to develop leaks within days, weeks, or months after installation. When you notice these leaks, know they may be caused by one or more of these possible causes;
- Using the wrong sink sealant. Using the wrong kitchen, bathroom sink sealant or undermount kitchen sink sealant is a sure way of creating sink problems. Always use pure, 100% silicone sink sealants. This is because silicone sealants are flexible and contain powerful adhesive properties.
- Problematic or poorly installed countertop bottom. The area at which the bottom contacts the sink should be well prepared. Before caulking, ensure that you have used denatured alcohol to clean off any debris that may interfere with the installation process.
- Failure to properly secure the clamps. You may have cleaned the sink bottom properly but failed to make the installation secure enough. Always make sure that the epoxy and the clamps used are tight enough so the caulk will not quickly pull off.
How to Seal Around Sink

How to seal around sink may sound daunting but it is in fact easy. You can perfectly learn how to replace silicone around sink, how to seal kitchen sink to granite, and even caulking around bathroom sink all by reading through the following simple steps.
- Make sure the clamps are holding the sink bottom to the countertop securely. You can do this by crawling under the sink and checking the clamps. If they are loose, tighten them up.
- Apply undermount sink sealant. Apply silicone sealant around the seam around sink. This will take care of any leaking problems that may have been present.
- Re-caulk. If you have made sure that the clamps are secure and tight, you can try to re-caulk to see whether the problem still exists.
However, you need to note that the best solution to sealing bathroom sink to countertop is to remove the sink entirely and reseal it to the countertop. And without wasting any time, here is how to seal around sink in simple steps;
- Turn off the water at the mains.
- Remove the pipes and other plumbing materials.
- Unclamp the sink from the countertop.
- Pull the sink away from the countertop.
- Scrape or clean off as much caulk as you can. Use a sharp cutting tool or a putty knife to remove the old sink sealant. You can also use a silicone remover.
- Use denatured alcohol to thoroughly clean the surfaces. Make sure to avoid using water in the cleaning process. If you do not have denatured alcohol, you can use a regular house cleaning agent. Spray a paper towel or a piece of cloth with a household cleaner and use it to clean the surfaces. After doing this, clean the surfaces again using a bleaching agent and then leave the surfaces to dry.
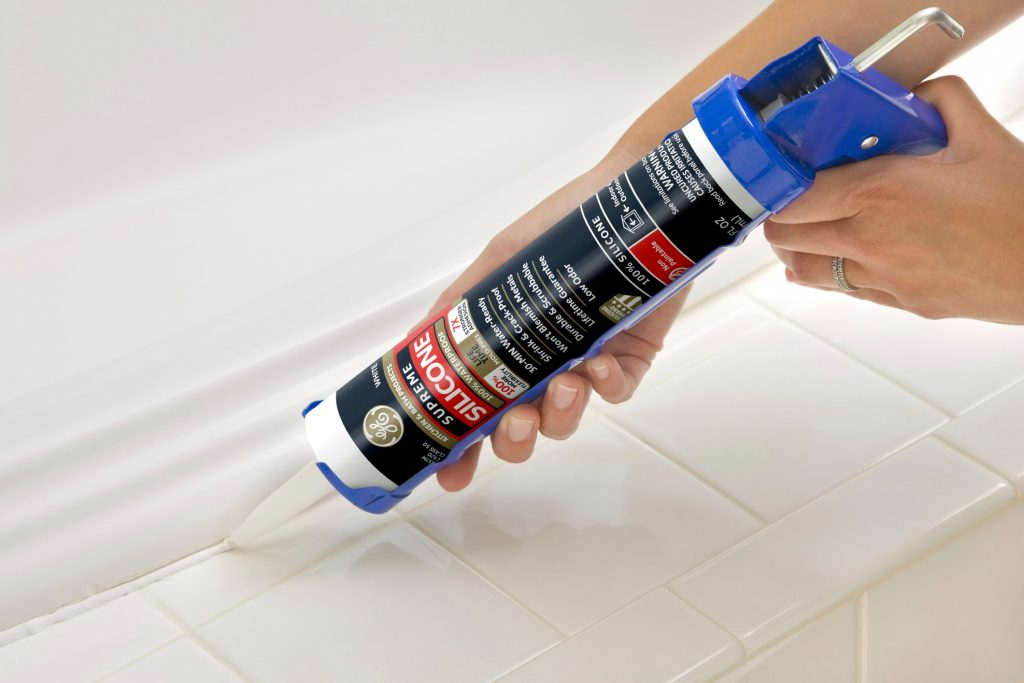
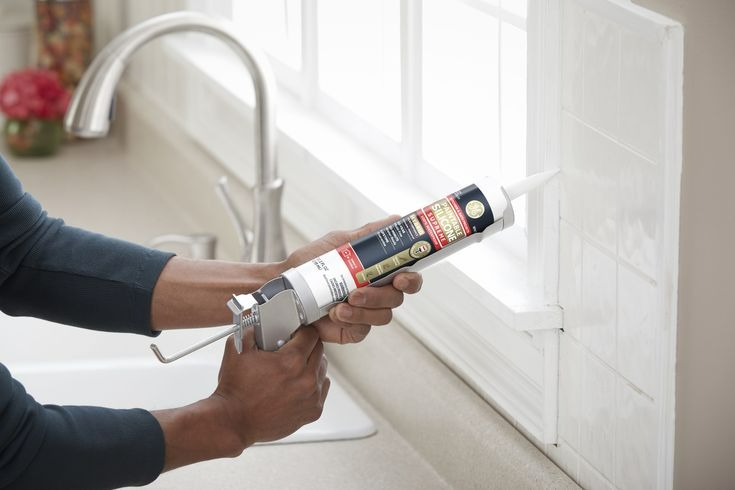
- Prepare and apply a thin globule of pure and 100% silicone sealant to the top lip of the sink. Put the cartridge in the silicone sealant gun then cut the nozzle to a good width at the tip. Make sure the sealant flow is okay by testing it on a scrap surface. After making sure the surfaces are completely dry, apply the sealant uniformly around the sink. Also, make sure that you smoothened the caulk around the sink and the countertop by using a tooling gadget.
- Quickly re-install the sink before the silicone cures. Avoid exposing the surfaces or the newly applied sealant to water until everything dries up.
- Clamp the sink tightly into place. Make sure the clamps are tight enough so that there is no possibility of leaking.
- Wipe off any sealant that may have seeped through on the sides of the sink. Remove excess sealant or any that overflowed to other surfaces. Wipe off with a clean rag or a good silicone sealant remover.
Best Products to Seal Around Sink
The best products to seal around sink should always ensure that the sink remains waterproof and resistant to mold. For this purpose, always make sure that any sealant you use for sealing kitchen or bathroom sinks is mold resistant and waterproof. To save you time and lead you to the best products to seal around sink that you can get quickly and cheaply, we have sampled the best two silicon sealants and a set of ten pieces of caulking tools that you need.
1. Supreme Silicone Bath & Kitchen Sealant

Supreme Silicone Kitchen & Bath Sealant is one of the best products to seal around sink because it comes loaded with the following sealing properties;
- Waterproof. The formula used in this silicon product is 100% waterproof. This means that it will provide a reliable seal to waterlogged surfaces like your sink.
- Mold-free. Supreme silicon kitchen & bath sealant offers protection against mold and mildew growth that causes stains.
- Strong flexibility and adhesion properties.
- Becomes ready for water after a 30-minute wait.
- Does not crack or shrink easily as a result of temperature changes.
- Does not affect or blemish or discolor metals such as bronze, chrome, or nickel.
- Low amounts of odor when cuing.
- Comes with a guarantee.
- Cannot be painted. It is made to be used in areas that do not require painting.
2. Advanced Silicone 2 Kitchen & Bath Sealant

Advanced Silicone 2 Kitchen & Bath is another highly useful product that you can use as your silicone sealant for wash basin, kitchen sink sealant, or bathroom sink sealant. It is highly recommended because it comes with the following silicon sealant properties;
- 100% silicon and waterproof. It, therefore, means that this sealant will provide powerful protection from water leaks and other sink problems.
- Mold-free. The product comes with 10-year mold-free product protection.
- Flexible and strong adhesive properties.
- Does not shrink or crack easily.
- Comes with a 30-minute wait period.
- Does not blemish or discolor high-end metals.
- Low odor.
- Not paintable.
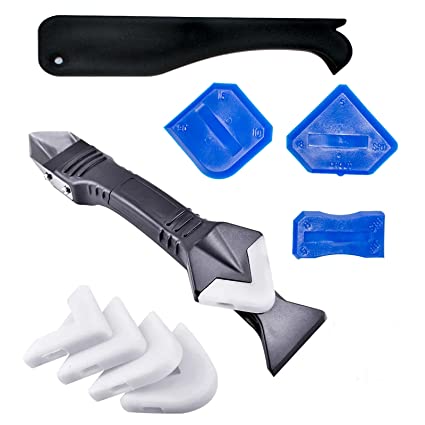
3. 10 Pcs Caulking Tools

This is a set of 10 caulking tools that include 3 in 1 caulking finishing tool kit (stainless steelhead), a caulk nozzle applicator for bathroom, kitchen window and sink joint, and a silicone sealant caulk grout remover scraper. Some of their features include the following;
- 10 Pieces of sealant finishing tools.
- Wide applications in bathrooms, kitchens, floors, water tanks, and many others.
- 3 modes of scraper and 5 silicone pads.
- One-year warranty for replacement.
Final Thoughts
During the process of installation, bathroom and kitchen sinks are sealed to the countertops in a professional manner that ensures that your sinks do not leak. However, not all installations are perfect, and every sink installation gets dilapidated with time. You will find that your sink is leaking due to cracking or aging of the sink sealant used. You can choose to contact an expert to repair your kitchen sink sealant issues that will cost you some money and a lot of your time, or choose to do it yourself. Fortunately, now you can fix the sink on your own. How? By following our expert guide on how to seal around sink in simple steps as we have offered you here. After going through our easy steps on how to seal around sink, you are now an impeccable do-it-yourself expert on any sink-sealing problem.
Frequently Asked Questions About How to Seal Around Sink
You can use silicone sealant to seal around bathroom sink. Using a firm, steady and even stroke, apply the silicone sealant in a thick and uniform bead into the crack between the bathroom sink and wall or countertop.
Silicone or latex. Caulk that uses silicone or latex is considered the best for your bathroom sink. Silicone provides a strong seal against moisture while latex is quite easy to use.
0 Comments for “How to Seal Around Sink in Simple Steps”